A corner clamp earns its place when two boards need to stay together while you reach for a drill, check a joint or wait for glue to set. The useful one is the clamp that fits your work and leaves room to finish it.
We selected seven corner clamps for this 2026 guide, from handheld assembly helpers to bench-mounted designs and a light-duty option for occasional projects. Our recommendations compare documented features, capacities and access around the joint. These are research-based reviews; we have not physically tested clamping pressure, squareness or durability.
These are research-based reviews; we have not physically tested these products.
These picks focus on woodworking assembly. Check the finished angle with a reliable square, and check a box or frame across its diagonals. A clamp can hold poorly cut parts under tension without fixing their geometry. Positioning squares that require separate clamps and full-perimeter band clamps are different tools.
Three places to start
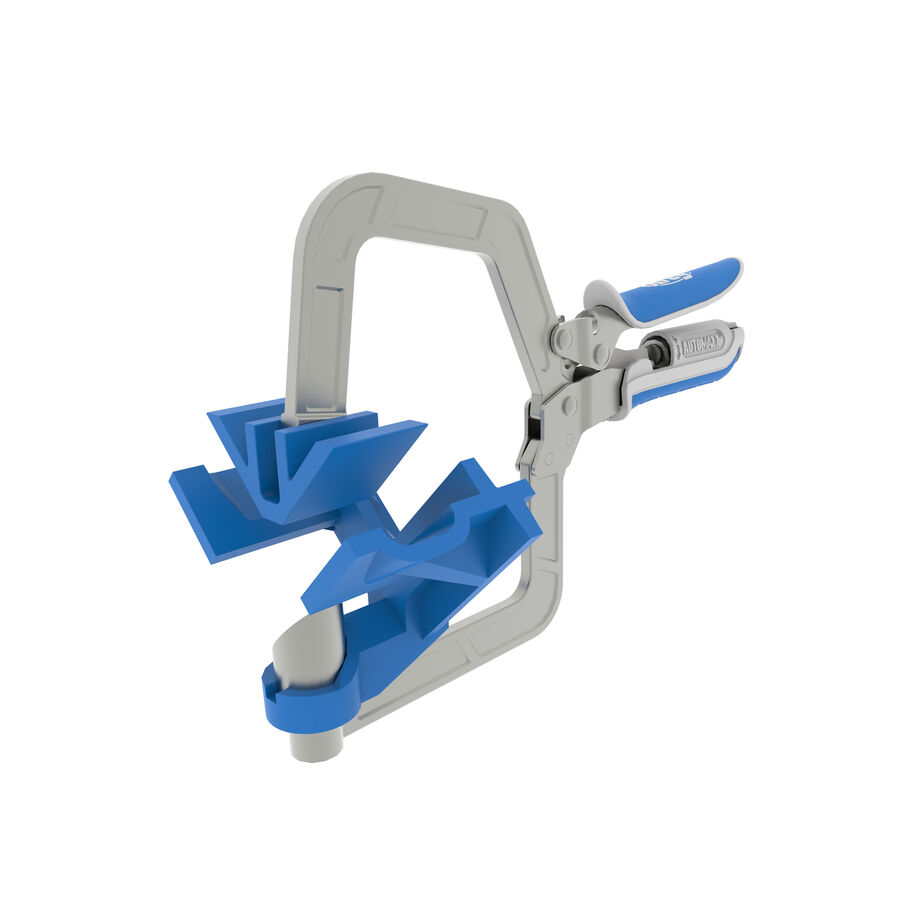
Kreg 90° Corner Clamp
A convenient helping hand for corner and T-joint assembly within its stated capacity.
Find on Amazon Read our review →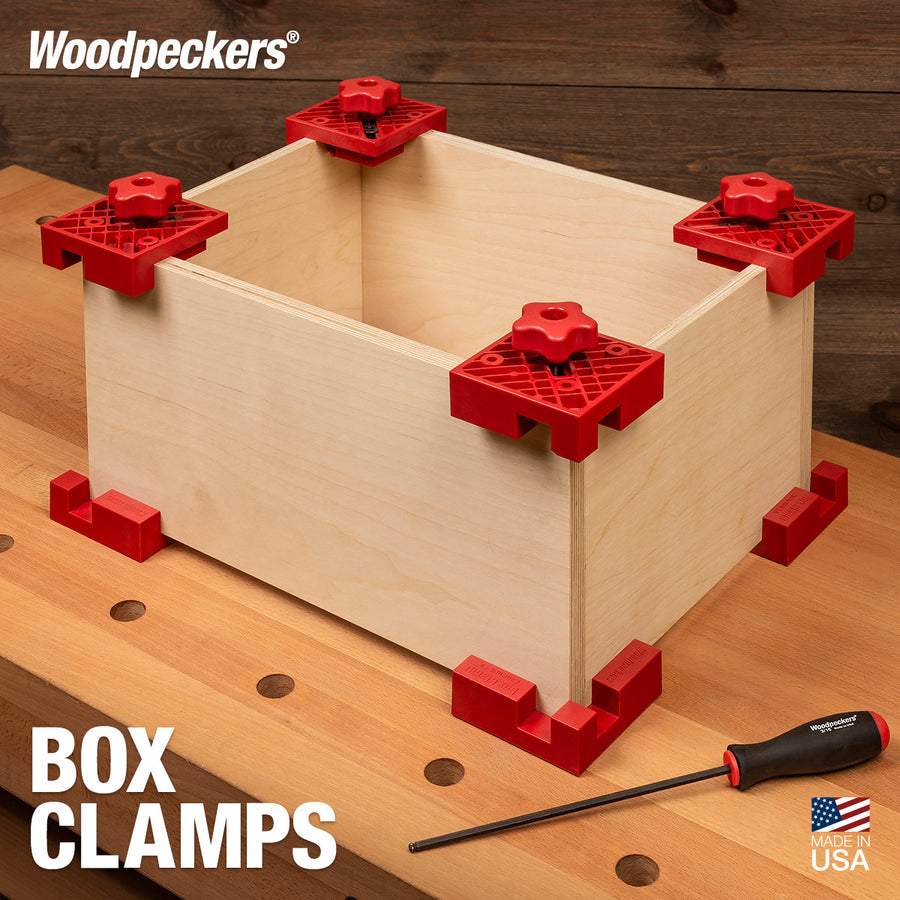
Woodpeckers Box Clamps
A low-profile arrangement that keeps the outside corner available for joinery and fasteners.
Find on Amazon Read our review →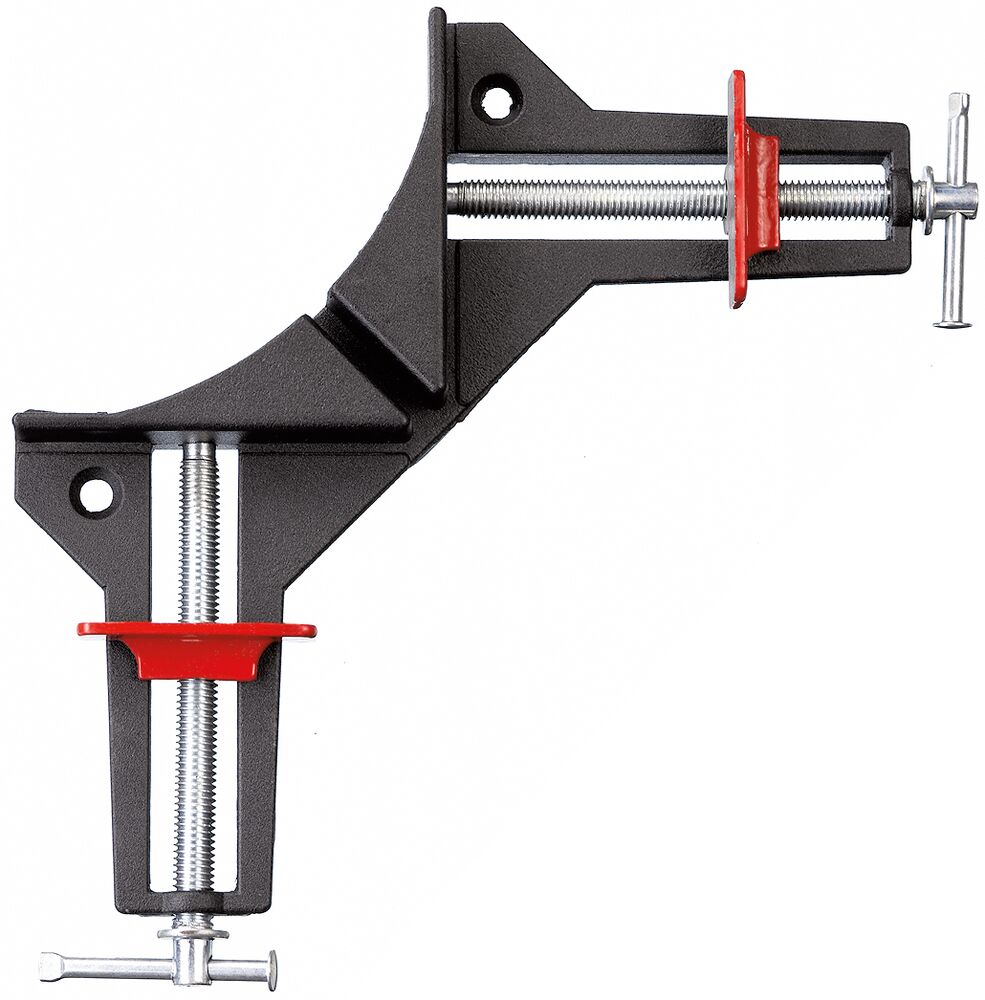
BESSEY WS-1 Corner Clamp
A simple fixed-angle clamp for modest miter and butt-joint projects.
Find on Amazon Read our review →Compare our seven picks
Start with the joint and available working space. Material-thickness capacity, jaw opening and T-joint passage describe different clearances, so compare the manufacturer's drawing rather than treating every inch figure as interchangeable.
| Our pick | Best for | Selected version / details | Shopping options |
|---|---|---|---|
| 01Kreg 90° Corner Clamp | overall | KHCCCAuto-adjust handheld clamp | Find product |
02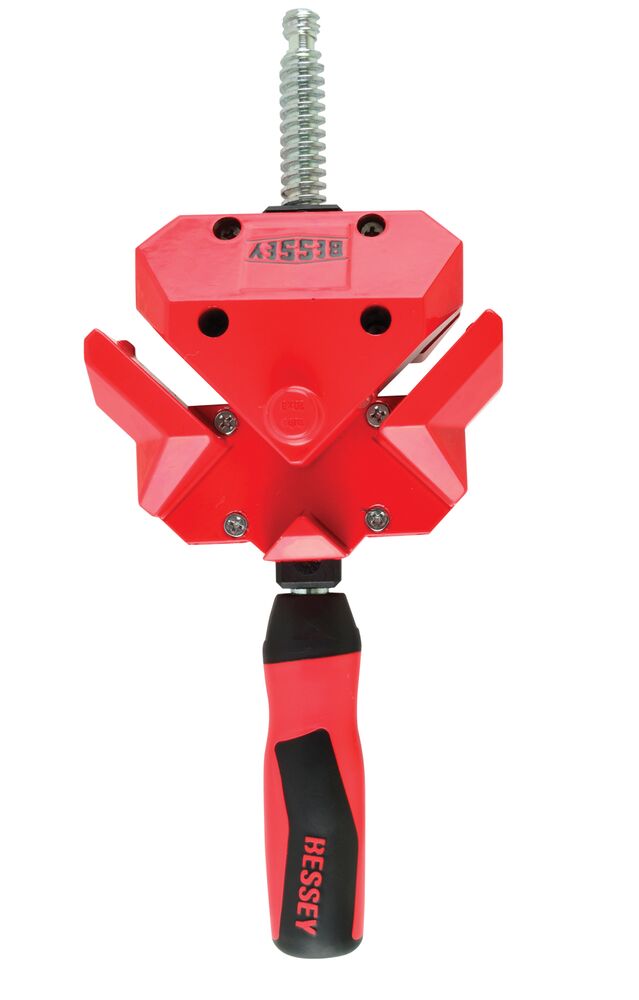 BESSEY WS-3 Angle Clamp | for mixed stock sizes | WS-3+2K-CBSingle-spindle angle clamp | Find product |
| 03Woodpeckers Box Clamps | for casework access | BC4-M2X2Low-profile wedge clamps | Find product |
04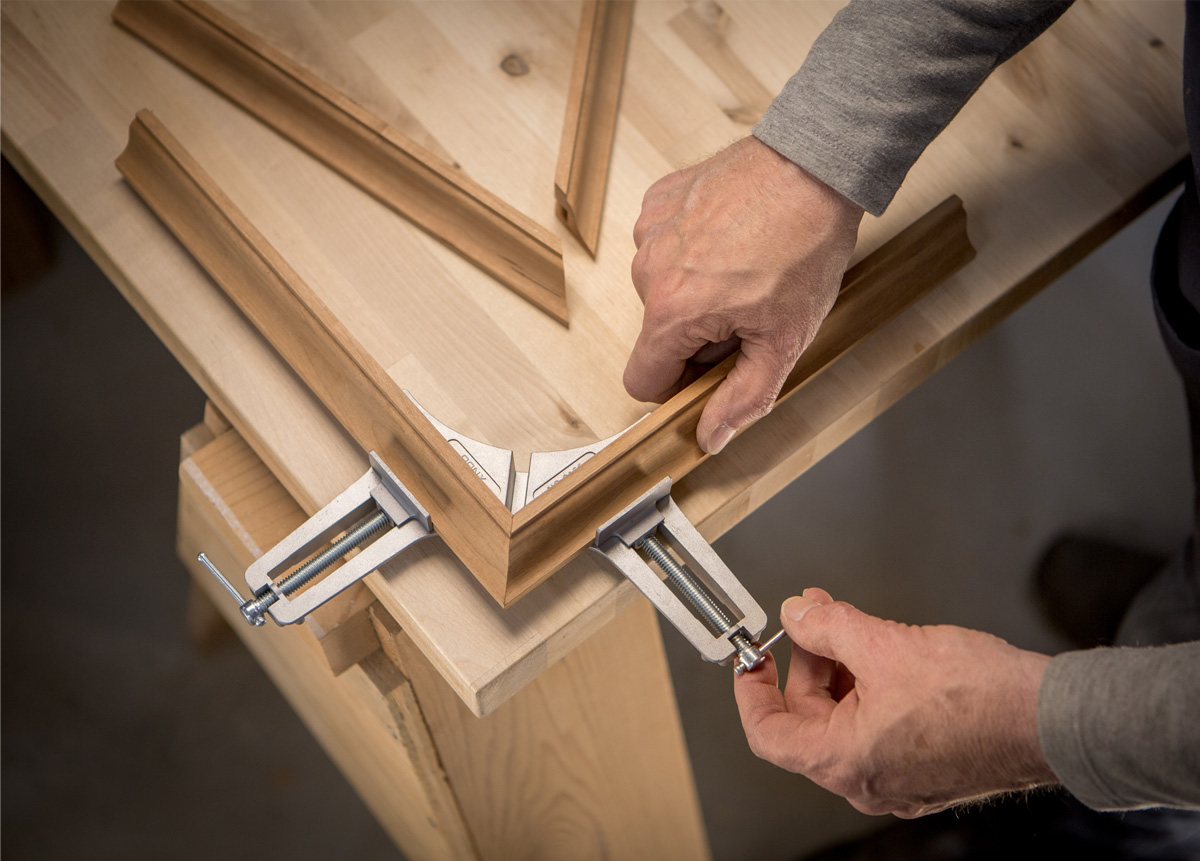 Pony 90° Corner Clamp | for small frames | 9166Dual-screw frame clamp | Find product |
05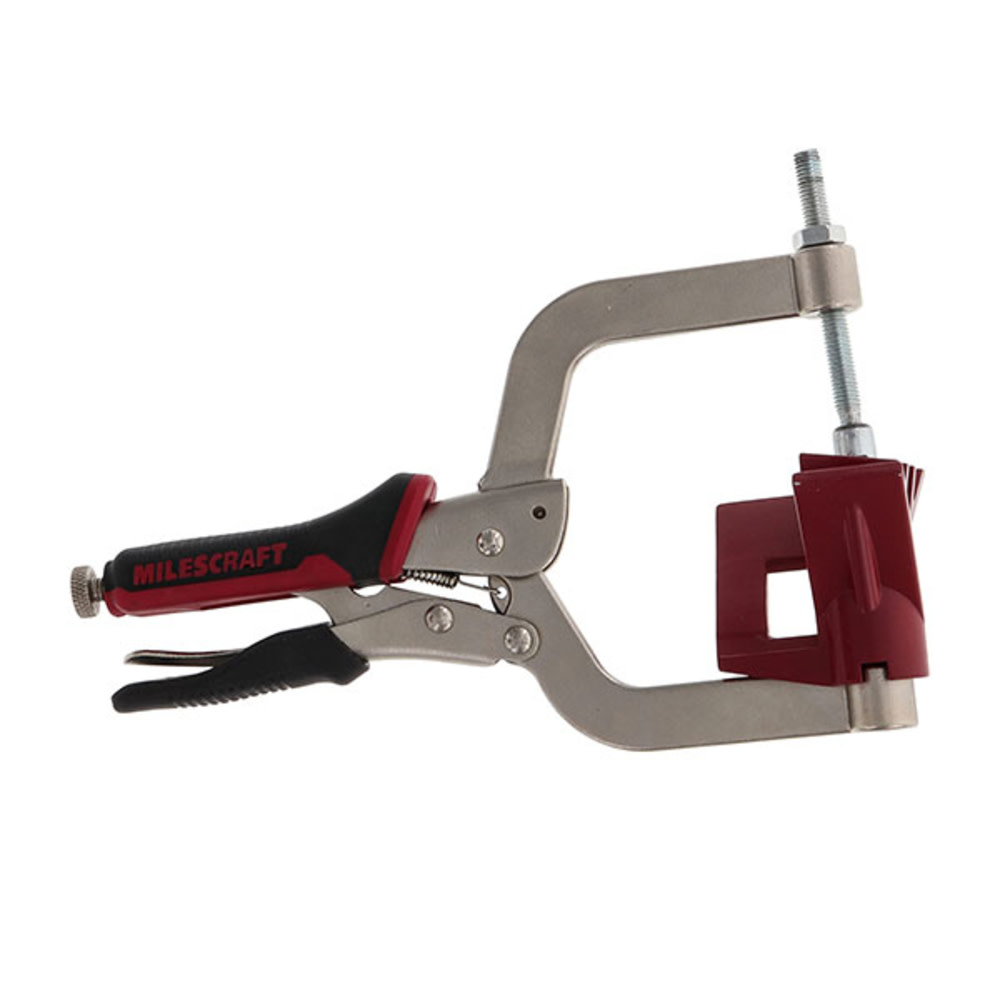 Milescraft 90° CornerClamp | handheld capacity alternative | 4005Swivel-head handheld clamp | Find product |
06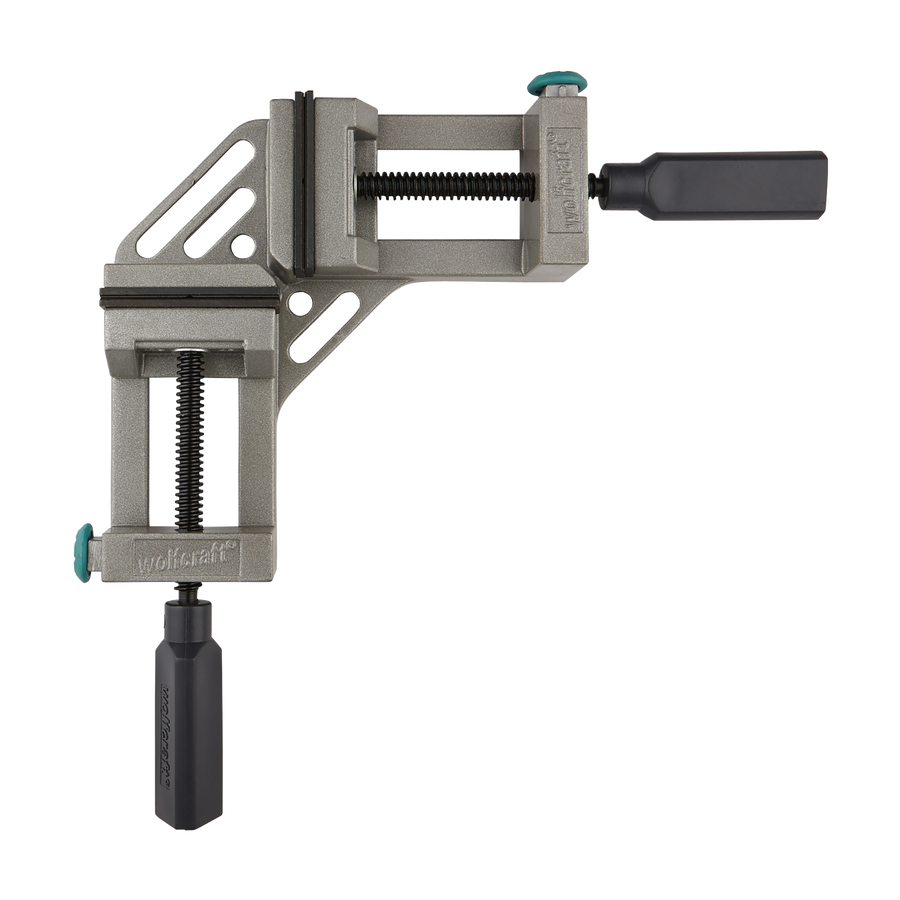 wolfcraft Mobile Corner Clamp | multifunction bench option | 3415000Dual-spindle bench clamp | Find product |
| 07BESSEY WS-1 Corner Clamp | for occasional light work | WS-1Light-duty dual-spindle clamp | Find product |
Amazon buttons open product-specific search results, not verified live offers. Check the exact formula or model, size, quantity, seller and availability. We do not display unverified prices or star ratings.
Showing all 7 products
Our 7 picks, reviewed in detail
“Best for” reflects our editorial assessment of documented features and intended uses. These are research-based recommendations, not results from hands-on product testing.
Kreg 90° Corner Clamp
A convenient helping hand for corner and T-joint assembly within its stated capacity.
- Selected version
- KHCCC
- Key details
- Auto-adjust handheld clamp
The Kreg KHCCC is our overall pick for ordinary cabinet, drawer and box assembly because its design concentrates on holding the joint while you add fasteners. Kreg documents a one-inch maximum material capacity, an outside V-pad and an inside wedge. Automaxx adjustment lets the jaws accommodate different material thicknesses at the pressure setting you choose.
That makes it a useful candidate for repeated corners. Kreg's product Q&A specifies matching thicknesses for the two mating pieces; automatic adjustment should not be read as permission to join unequal stock. Check board thickness and screw access before buying. The clamp occupies both sides of the joint, and you still need to set pressure and verify alignment. We have not measured how accurately it holds a finished assembly.
+ Why consider it
- Designed for corners and T-joints
- Automatic adjustment across compatible thicknesses
- Cast-aluminum V and wedge pads
− Keep in mind
- One-inch maximum material thickness
- Jaw placement can restrict fastening access
Our verdict: A practical first shortlist choice for repeated handheld assembly of compatible stock.
Try the driver position before tightening the clamp for the final fastening step.
BESSEY WS-3+2K-CB Angle Clamp
A floating-jaw design for bringing differently sized pieces together at a right angle.
- Selected version
- WS-3+2K-CB
- Key details
- Single-spindle angle clamp
BESSEY's WS-3 is worth considering when the two pieces at a corner are not identical. The manufacturer describes a floating jaw that adjusts to different workpiece sizes, with one spindle applying the clamping action. The jaws have a protective coating, and the design leaves space around the joint for several common fastening operations.
Its bench-oriented shape suits an assembly station better than the most compact handheld options. Table-mount accessories are separate items in the manufacturer's listing, so include those in the comparison if you plan to secure the clamp to a surface. Also read the capacity diagram carefully: the range's combined clamping capacity and its T-joint passage are different specifications. Do not assume the larger number describes every available clearance.
+ Why consider it
- Floating jaw accommodates differing workpieces
- Single-spindle adjustment
- Optional table-mount accessories
− Keep in mind
- Mounting accessories may cost extra
- Capacity figures need careful interpretation
Our verdict: A useful bench companion for varied wood sizes and planned assembly work.
Measure the T-joint passage separately when a board must continue through the clamp.
Woodpeckers BC4-M2 Box Clamps
A low-profile arrangement that keeps the outside corner available for joinery and fasteners.
- Selected version
- BC4-M2X2
- Key details
- Low-profile wedge clamps
Woodpeckers takes a different approach with the BC4-M2: a wedge mechanism acts inside the assembly while leaving the outside corner unobstructed. That is the reason for our casework recommendation. The manufacturer describes use with boxes, drawers and cabinets, including joints where protruding pins or tails could interfere with a conventional outside jaw.
The supplied hardware allows fixture or hand-clamp setups, but switching between them is an actual setup step rather than a lever adjustment. The manufacturer specifies stock from a quarter inch to one inch thick, with no more than a quarter-inch difference between the two pieces. The selected BC4-M2X2 package contains two clamps. We would choose these when outside access is the main problem, after checking that the inside of the project has room for the clamp and for operating its hardware.
+ Why consider it
- Leaves the outside corner unobstructed
- Fixture and hand-clamp configurations
- Designed for box and case assembly
− Keep in mind
- Changing configuration requires hardware changes
- Limited allowance for unequal stock thickness
Our verdict: A purposeful choice when conventional outside jaws obstruct your joinery or fasteners.
Choose fixture or hand-clamp mode before the glue-up begins.
Pony 3-Inch 90° Corner Clamp
A conventional fixed-angle clamp that leaves the joint accessible for fitting and fastening.
- Selected version
- 9166
- Key details
- Dual-screw frame clamp
Pony's 9166 is a straightforward option for small frames and other compatible miter or butt joints. The manufacturer specifies a fixed 90-degree arrangement, workpieces up to three inches wide, and separate sliding jaws. Mounting holes allow the clamp to become part of a bench setup, while the joint remains exposed for the next operation.
This is the fixed-angle model, not Pony's adjustable 9133, so confirm the number when comparing offers. Two screws take a different rhythm from a squeeze-handle clamp, but they also let you approach the two pieces individually during setup. We would consider the 9166 for deliberate bench work where access to the corner matters more than rapidly moving one clamp between several upright cabinet joints.
+ Why consider it
- Fixed-angle setup for miter and butt joints
- Separate sliding jaws
- Benchtop mounting holes
− Keep in mind
- Limited to the documented workpiece width
- Two screws require individual adjustment
Our verdict: A sensible bench option for smaller framing projects and controlled joint access.
Check that the offer is model 9166 if you want the fixed 90-degree version.
Milescraft 90° CornerClamp
A corner and T-joint helper with a stated material limit above the Kreg selection.
- Selected version
- 4005
- Key details
- Swivel-head handheld clamp
Milescraft's 4005 is the handheld alternative to compare when your stock exceeds the Kreg pick's stated limit. Milescraft lists a maximum material thickness of one and a quarter inches, a swivel-head design, and cast-aluminum V and wedge pads. The intended woodworking applications include corners and T-joints in boxes, cabinets and drawers.
The extra stated thickness allowance is useful only if the rest of the geometry fits. Check the inside space, the mating faces and the position of your fasteners before treating it as a universal substitute. Its role is to hold the parts while your hands perform the next operation; it does not replace checking the completed angle. We have not compared its holding strength or adjustment speed against the other handheld pick.
+ Why consider it
- Stated 1-1/4-inch material capacity
- Swivel-head design
- Documented corner and T-joint use
− Keep in mind
- Capacity still depends on usable jaw placement
- No independent holding-force comparison
Our verdict: A useful alternative when the documented thickness range better fits your boards.
Measure the finished board rather than relying on its nominal lumber size.
wolfcraft Mobile Clamping Corner Clamp
A bench-oriented corner holder with an integrated guide for hand-sawn miters.
- Selected version
- 3415000
- Key details
- Dual-spindle bench clamp
The wolfcraft 3415000 combines perpendicular clamping jaws with an integrated 45-degree hand-saw guide. The manufacturer also describes using it as a small workbench vice. That combination makes it worth considering for someone who wants a compact assembly aid with an occasional additional cutting-guide role, rather than a dedicated handheld corner clamp.
Check the exact model and region before ordering: the reviewed manufacturer listing identifies 3415000 and gives a 65-millimeter clamping width. Similar-looking regional versions should not be assumed to include identical hardware or specifications. The saw-guide feature does not remove the need to mark carefully, support the work and verify the resulting miter. We would prioritize its clamp fit first and treat the extra functions as useful only when they suit your workflow.
+ Why consider it
- Perpendicular jaws with two spindles
- Integrated hand-saw miter guide
- Manufacturer documents bench-vice use
− Keep in mind
- Regional model numbers need checking
- Additional functions do not replace layout checks
Our verdict: A candidate for a small bench where several occasional operations share one setup.
Compare the 3415000 specifications with the model offered by your local seller.
BESSEY WS-1 Light-Duty Corner Clamp
A simple fixed-angle clamp for modest miter and butt-joint projects.
- Selected version
- WS-1
- Key details
- Light-duty dual-spindle clamp
The WS-1 is the simpler BESSEY option in this guide. The manufacturer places it in the light-duty category and documents two independently adjustable spindles, a fixed right angle and mounting holes. It makes sense as an occasional assembly helper when the project is small enough that a larger floating-jaw bench clamp would add unnecessary bulk.
The light-duty positioning should shape expectations. We would use it to support a well-fitting joint during a modest project, rather than to force warped stock into submission. Work out whether you need several units to control a complete frame and whether you can still reach the corner with your tools. The WS-1 and WS-3 names are similar, but their adjustment arrangements and intended workload are meaningfully different.
+ Why consider it
- Simple independent spindle adjustment
- Bench mounting holes
- Purposeful light-duty design
− Keep in mind
- Not a substitute for a heavier assembly fixture
- Several corners may need several clamps
Our verdict: A practical shortlist choice for occasional small projects with well-fitting parts.
Use the light-duty designation as a guide to the job, not a reason to overtighten.
How to choose the right corner clamp
1. Match the clamp to the joint
Picture-frame miters, cabinet corners and shelf T-joints create different access problems. Before shopping, sketch where the clamp will sit and where the fastener or drill must travel. A design that neatly grips a frame on the bench may be awkward high on an assembled cabinet. A handheld wedge clamp can be convenient at that upper corner, but its jaws still need suitable faces to bear against.
Also consider the number of corners you need to control at once. One clamp can help with sequential fastening. A glue-up that must hold four joints together may need several clamps and additional support. Plan the assembly sequence before deciding that one expensive clamp or four inexpensive ones is the better purchase.
2. Read capacity figures in context
Measure the actual stock, including any attached edging or pad that will sit between the jaw and the work. Then identify what the specification measures. Kreg's stated maximum material thickness is a different concept from the opening along a frame clamp's two sides. BESSEY also lists a separate passage for a T-joint on its angle-clamp range.
Leave space for the shape of the work, not just its nominal thickness. A routed profile, projecting joint or bevel may contact a jaw before the intended flat face does. If you cannot see how the clamp seats against your parts, check its instructions or try a comparable dry arrangement before committing to a batch of assemblies.
3. Think about pressure and surface contact
The goal is to hold the joint in its intended position without crushing a soft edge or bowing a panel. Do not choose solely by the biggest advertised force. The shape and position of the contact pads, the amount of adjustment and the ability to reach the handle matter just as much in everyday assembly.
Use suitable protection when the project finish needs it, while allowing for the extra thickness in the clamp's capacity. Clean dried glue and trapped debris from contact areas. If tightening opens another part of the joint, stop and inspect the setup; more pressure can hide a fitting problem until the clamp comes off.
4. Keep fasteners and glue cleanup accessible
A clamp is most helpful when it lets the next operation happen. Check the path of the drill chuck, bit extension, nailer nose or screwdriver, not only the screw hole itself. A clamp that looks clear in a photograph may block your actual tool once two full-size panels are standing in place.
Work out how you will wipe squeeze-out and release the assembly after curing. An open outside corner can be useful for fastening, while a bench fixture may be better for repetitive positioning. Neither arrangement replaces support under a long board that could twist or tip the whole setup.
5. Choose a setup you can repeat
For one-off repairs, a small clamp that stores easily may be enough. Repeated frames or cabinet parts can justify a fixed bench arrangement with reference stops. Check whether mounting accessories are included; a pictured table clamp may be an optional item. Also make sure the mounting position leaves enough room to turn handles and remove finished work.
If portability matters, account for the complete working kit. A positioning square needs separate clamps, a fixture needs mounting hardware, and a corner clamp may still need another support to hold a large assembly. Compare the useful system you will actually carry or set up.
6. Verify the result independently
Treat a manufacturer's right-angle description as the tool's intended function, not a measurement of your completed project. Use a known square at the joint and compare diagonals across a rectangular frame or case. Check again after fastening because driving a screw can move the parts.
These recommendations are for the woodworking jobs described in each review. Do not assume every corner clamp is suitable for welding heat, lifting or supporting a suspended load. Select a purpose-built tool and follow its instructions when the task changes.
7 practical tips
- Dry-fit the whole assembly first. Lay out the boards, clamps and tools before adding glue. Confirm that every clamp can be tightened and removed in the intended order.
- Check the cut edges. Remove debris and inspect mating surfaces. A gap caused by the cut should be corrected before you try to close it with extra pressure.
- Support the free ends. Use a stable work surface and suitable supports so long boards do not twist the corner or pull the assembly off the bench.
- Set pressure gradually. Bring the parts into position, inspect alignment, then tighten as directed. Watch for a panel bowing or a soft edge beginning to mark.
- Test the tool path. Bring the drill or driver into position before fastening. Reposition the clamp if its body blocks the chuck, bit or your line of sight.
- Measure after fastening. Recheck the corner and, for rectangular assemblies, the diagonals. A screw or nail can shift a joint that looked aligned a moment earlier.
- Clean before storing. Remove glue using a method appropriate for the clamp and follow its maintenance instructions. Keep threads and contact faces free of buildup.
A few things you might be wondering
What is the best corner clamp for most woodworking projects?
Kreg's KHCCC is our overall research-based pick for everyday corner and T-joint assembly within its stated one-inch material capacity. The best choice changes with the job: a bench angle clamp can suit framing, while a low-profile box clamp may leave better access around casework.
Will a corner clamp make every joint exactly square?
No clamp can guarantee the geometry of the parts or the completed assembly. Cut accuracy, debris, workpiece distortion and mounting position all matter. Use a reliable square at the joint and check diagonals where appropriate, both before and after fastening.
How many corner clamps do I need?
That depends on the assembly sequence. One can hold a joint while you fasten it, while a four-corner glue-up may require several clamps operating together. Rehearse the job dry and include any supports or additional clamps needed to keep the whole assembly stable.
Can I use these for T-joints as well as corners?
Some are specifically documented for T-joints, including Kreg KHCCC and Milescraft 4005. Check the usable passage and access for the actual stock. A tool intended mainly for frame miters should not be assumed to accept a long board running through the joint.
Is a positioning square the same as a corner clamp?
A positioning square provides a reference angle and commonly needs separate clamps to hold the work to it. A corner clamp includes its own holding mechanism. Both can be useful, but compare the complete kit and available working space before choosing.
Should I buy a band clamp for picture frames instead?
A band clamp acts around the perimeter and can help bring several frame corners together at once. Individual corner clamps can be useful when you need access to one joint or want a fixed bench setup. Consider the frame profile and fastening method rather than assuming the two tools are interchangeable.
Can these corner clamps be used for welding?
This guide recommends them for the woodworking uses described. Some manufacturer pages list additional metalworking applications, but that does not make every clamp or pad suitable for your welding process. Check the exact tool's instructions and choose a dedicated welding fixture when required.
Why are there no pressure rankings or star ratings?
We have not independently measured holding force, squareness or wear. Advertised capacities use different definitions and marketplace ratings can change. Our picks compare documented design features and practical fit rather than presenting an unverified performance contest.
How we chose these products
We prepared this October 28, 2026 guide using manufacturer product information, specifications and care or usage instructions. We selected seven identifiable products to cover different practical needs and explain the limitations alongside the benefits.
The order is an editorial assessment of suitability. We have not physically tested these products, measured their performance or independently verified marketing claims. Prices, stock, packaging and formulas can change. The references under each review identify our sources; check the current instructions for the product you receive.
Manufacturer and product imagery is used to identify the selections. Amazon links are clearly labeled product searches and use our affiliate tracking ID; we have not verified live offers for every selection.
A better assembly starts with a well-held corner.
Match the joint. Leave room to work. Check the result.
Back to the comparison ↑